Daily Cinema4D – Jitter Math
Colorful video at the top because the rest of this post is grey. This is with the original XPresso nest algorithm.
Someone in a Discord group I’m in asked how to add a jittering vibration to the end of a radial cloner, aiming to create a “dial” effect like an RPM gauge on a car at idle. I ended up going through three increasingly simple (and better) iterations before finding the right approach.
I started with an overly complex XPresso setup. It worked, but involved random jitter values, history nodes, modulo math, and smoothing with blend factors, all of which were WAY more effort than necessary. Then I realized I could have just used a basic Vibrate tag. Simple, built-in, and does the job with almost no setup.
Eventually, someone pointed me to something totally new to me: the Track Modifier tag. I hadn’t used it before, but it allows you to apply procedural effects like noise directly onto an animation track with no XPresso required! It was exactly what I needed and way more elegant than my original approach.
This was a good reminder that sometimes the simpler tools are the most effective. At least when I overbuild something at first, I learn along the way. I ended up learning quite a bit about XPresso history and memory handling, and also picked up a new tag I’ll definitely be using in the future.
My first solution – An XPresso Nest
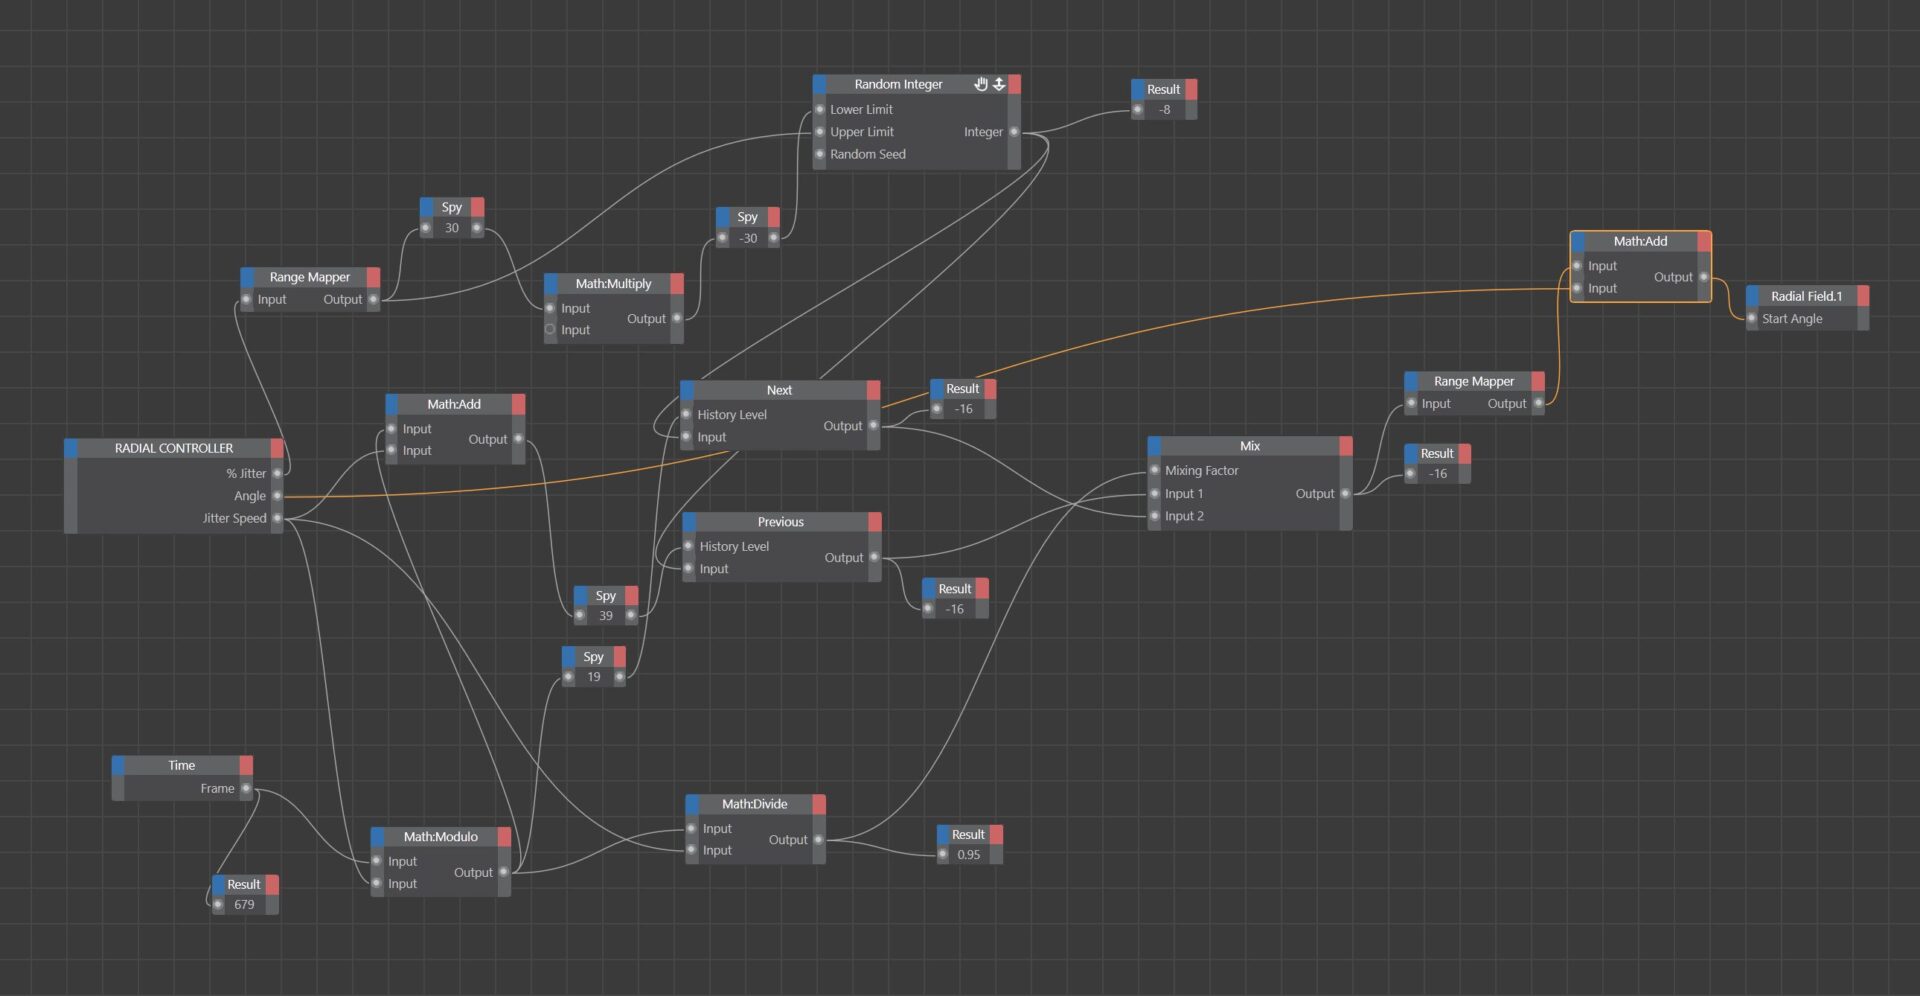
XPresso Nodes
10% Jitter is set as UserData, representing the percentage of jitter range allowed. This value is passed into a Range Mapper to convert the degrees into integers (this makes it easier to work with downstream). That result is used to set the min/max bounds for a Random Integer node, for example -Jitter (using the Math:Multiply node) to +Jitter (directly from UserData).
To get a stable random value that updates at a fixed interval:
Random Integer generates a new value every frame. Two History nodes store these values:
-
Nextholds the current jitter value. -
Previouslooks back a number of frames (e.g., 5 frames ago) to get the earlier jitter.
To determine when to update the jitter:
-
If
Frame % Interval == 0, it’s a new interval — pick a new jitter. -
If
Frame % Interval == 2, we’re 2 frames into this interval, so use the value from 2 frames ago.
This remainder becomes the History Level — how far back we look to get the correct current jitter value. To get the previous jitter value (from the start of the last interval), we add the interval to the modulo result:
Example:
-
Frame =
12, Interval =5 -
12 % 5 = 2 -
Use
HistoryLevel = 2to get current jitter -
Use
PreviousHistoryLevel = 7to get previous jitter
To transition smoothly from the previous to the current jitter value:
A Mix node - (PreviousJitter (0%), CurrentJitter (100%), BlendFactor(controls the 100%)
A Mix node blends between the two jitter values. BlendFactor is the percentage through the current interval:
This goes from 0.0 to 1.0 across the interval.
The blended jitter is then mapped back to degrees using a Range Mapper, added to the base rotation value, and used to drive the Start Angle of the radial field.
Phew. Well, that was a lot, but it works!
Video of my Xpresso algorithm.
My second solution – Oh right a vibration tag exists
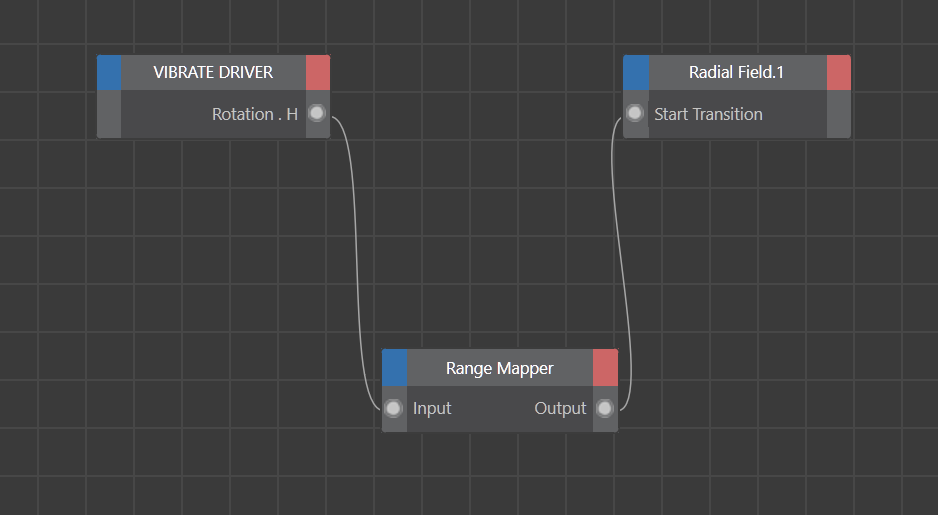
Oh shoot. Ok. I totally forgot about the vibrate tag, which does everything my Xpresso set-up does and more. This makes it WAY easier – I put the vibrate tag on a null so I can use its H-position to drive either the Start Angle (with some math – add the position to a UserData Start Angle) or to the Start Transition directly for a cool effect.
My third solution – I ask for help
I reached out to the Medical Animator C4D Discord to see if anyone had ideas, and Molly Hutner recommended the Track Modifier tag, which you can use to drive animation tracks with noise. No XPresso needed at all! Extremely art-directable! Wow.
Video for Trakc Modifer tag.


